
HTML Form
Updated:
HTML Form이란 무엇인가
HTML Form은 HTML에서 제공하는 사용자로부터 인풋 받는 프론트엔드 요소이다. HTML Form을 통해 사용자로부터 입력받은 데이터들은 웹 서버와 데이터베이스로 보내져 처리가 되게 된다.
html form 예시
HTML Form의 문법
1. Form 요소
<!DOCTYPE html>
<html>
<body>
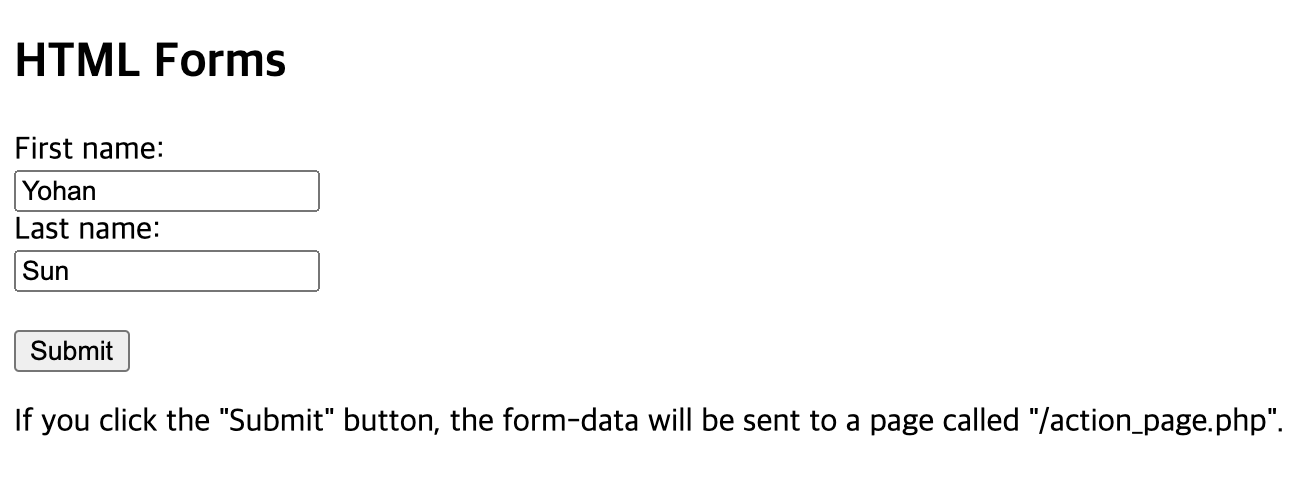
<h2>HTML Forms</h2>
<form action="/action_page.php">
<label for="fname">First name:</label><br>
<input type="text" id="fname" name="fname" value="Yohan"><br>
<label for="lname">Last name:</label><br>
<input type="text" id="lname" name="lname" value="Sun"><br><br>
<input type="submit" value="Submit">
</form> <!--form 요소는 사용자로부터 데이터를 입력받는 양식을 만드는 요소이다 -->
<!--form 요소 안에는 text fields, checkboxes, radio buttons, submit buttons 등의 다양한 인풋 요소를 쓸 수 있다 -->
<p>If you click the "Submit" button, the form-data will be sent to a page called "/action_page.php".</p>
</body>
</html>
결과
2. HTML Form의 요소들 - Input
<!DOCTYPE html>
<html>
<body>
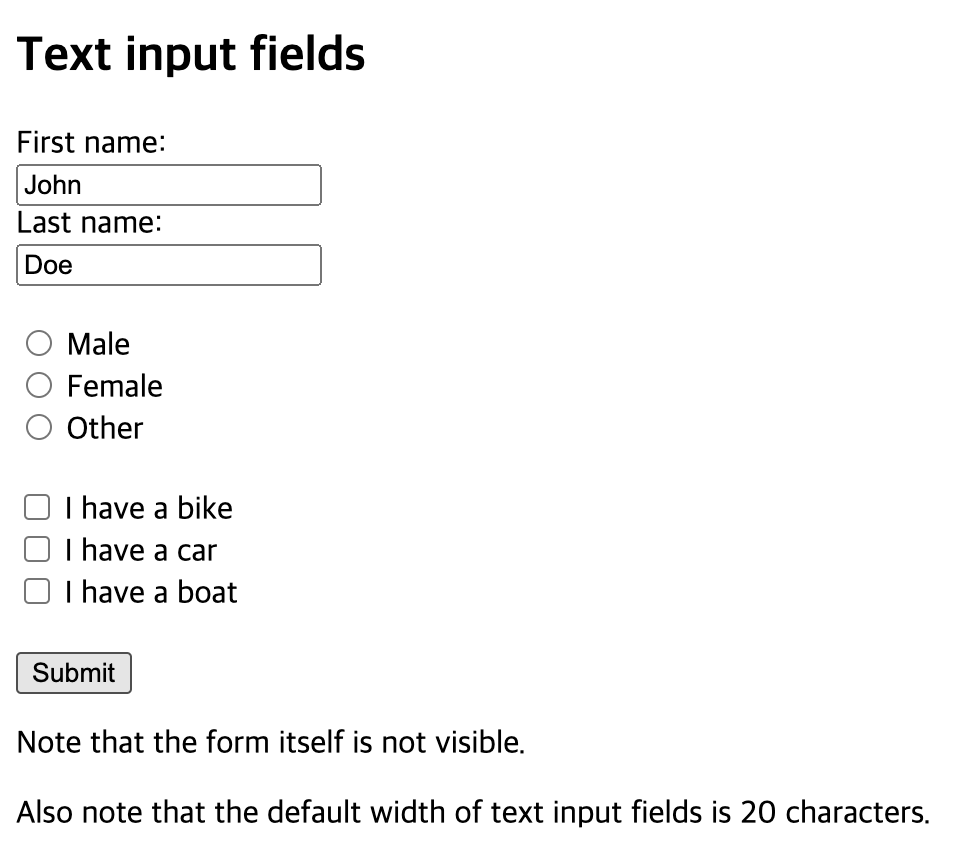
<h2>Text input fields</h2>
<form action="/action_page.php">
<label for="fname">First name:</label><br>
<input type="text" id="fname" name="fname" value="John"><br>
<!-- label 요소는 Form 안에서 텍스트를 입력할 때 사용되는 요소이다. Label요소는 for라는 속성의 값과 동일한 input요소의 id속성의 값와 연결된다. 예를 들면 위 코드의 경우 label 요소의 for 속성에 "fname"이라는 값이 들어가있고 바로 아래에 input 요소에 id속성의 값 역시 "fname"으로 들어가 있기 때문에 위의 라벨과 인풋은 서로 연결되어있다. 이런 경우 사용자가 라벨을 누르면 해당 라벨이 연결되어 있는 인풋요소가 시각적으로 강조되어서 어디에 사용자가 데이터를 어디에 입력해야 하는지 알게 해준다. -->
<!-- input type="text"는 텍스트를 입력하는 란을 보여주게된다 -->
<label for="lname">Last name:</label><br>
<input type="text" id="lname" name="lname" value="Doe">
<input type="radio" id="male" name="gender" value="male">
<label for="male">Male</label><br>
<input type="radio" id="female" name="gender" value="female">
<label for="female">Female</label><br>
<input type="radio" id="other" name="gender" value="other">
<label for="other">Other</label>
<!-- input type="radio"는 여러 초이스 중에 한개만 선택할 수 있게 해준다 -->
<!-- 위의 코드의 경우 "male"과 "female"과 "other"가 선택지로 주어지는데 이 3가지가 하나의 라디오버튼 영역으로 묶이기 위해서는 name의 속성이 같아야 한다. 위의 경우 "gender"라는 동일한 name 속성으로 묶여있기 때문에 저 세가지 버튼 중에 하나만 선택할 수 있게 된다 -->
<input type="checkbox" id="vehicle1" name="vehicle1" value="Bike">
<label for="vehicle1"> I have a bike</label><br>
<input type="checkbox" id="vehicle2" name="vehicle2" value="Car">
<label for="vehicle2"> I have a car</label><br>
<input type="checkbox" id="vehicle3" name="vehicle3" value="Boat">
<label for="vehicle3"> I have a boat</label><br><br>
<!-- input type="checkbox"는 여러 초이스 중에 여러개를 선택할 수 있게 해준다 -->
<!-- input type="radio"와 달리 name이 동일할 필요는 없다 -->
<input type="submit" value="Submit">
<!-- input type="submit"은 form 요소 안에 있는 데이터들을 지정된 서버의 파일(위의 코드의 경우 action_page.php) 로 보내게 된다 -->
<!-- submit이 정상적으로 이루어지기 위해서는 각 Input 요소는 name 속성을 가지고 있어야 한다 -->
</form>
<p>Note that the form itself is not visible.</p>
<p>Also note that the default width of text input fields is 20 characters.</p>
</body>
</html>
결과
4. HTML Form의 요소들 - Select
<!DOCTYPE html>
<html>
<body>
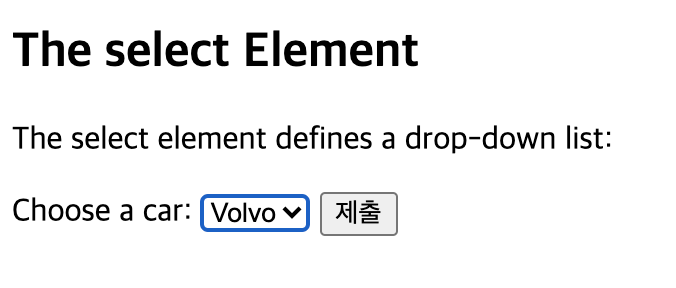
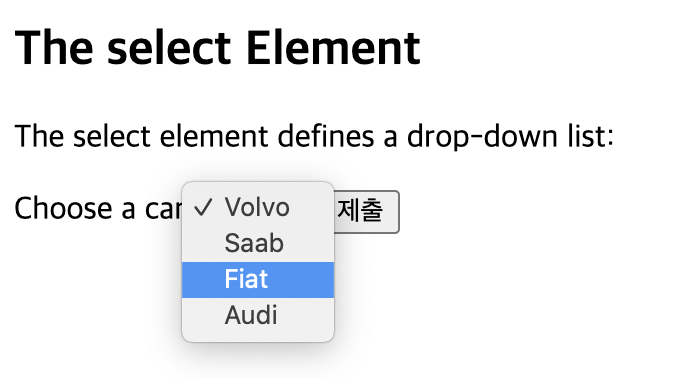
<h2>The select Element</h2>
<p>The select element defines a drop-down list:</p>
<form action="/action_page.php">
<label for="cars">Choose a car:</label>
<select id="cars" name="cars">
<option value="volvo">Volvo</option>
<option value="saab">Saab</option>
<option value="fiat">Fiat</option>
<option value="audi">Audi</option>
</select>
<!-- Select 요소는 옵션으로 지정한 값들을 목록으로 보여준다 -->
<!--이 때 "<option value="fiat" selected>Fiat</option>" 이런식으로 selected라는 속성을 주게 되면 디폴트 값으로 해당 옵션이 들어가게 된다. 만약 selected라는 속성을 주지 않는다면 가장 첫번째 요소(위의 경우 Volvo)가 디폴트 값으로 들어가게 된다. -->
<input type="submit">
</form>
</body>
</html>
결과
5. HTML Form의 요소들 - Textarea
<!DOCTYPE html>
<html>
<body>
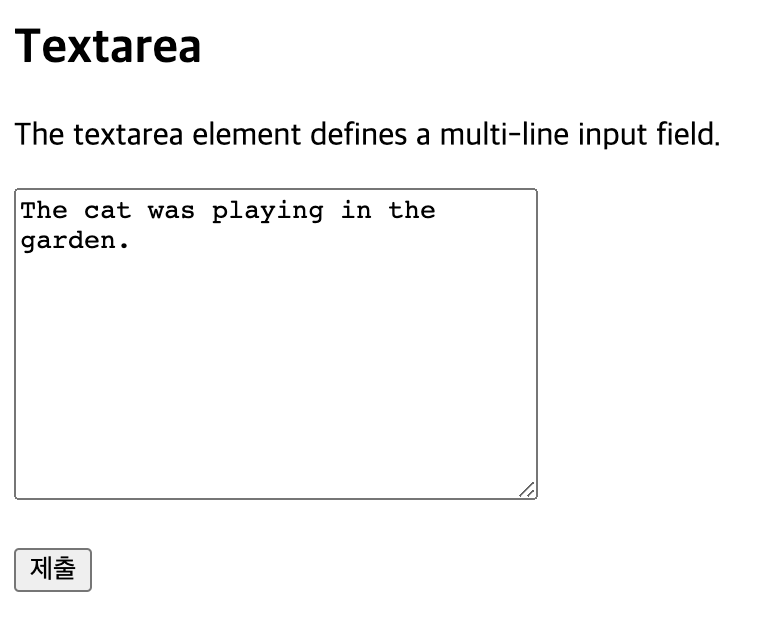
<h2>Textarea</h2>
<p>The textarea element defines a multi-line input field.</p>
<form action="/action_page.php">
<textarea name="message" rows="10" cols="30">The cat was playing in the garden.</textarea>
<br><br>
<!-- Textarea 요소는 여러줄의 인풋을 받게 해준다 -->
<!-- Textarea 요소에서 row는 줄의 개수, column textarea의 넓이를 지정해준다 -->
<input type="submit">
</form>
</body>
</html>
결과
6. HTML Form의 요소들 - Button
<!DOCTYPE html>
<html>
<body>
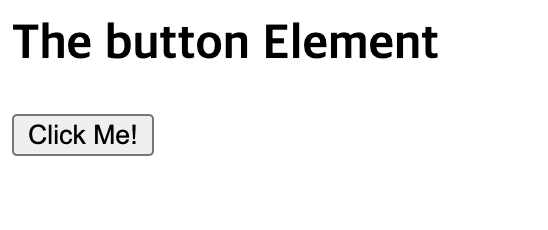
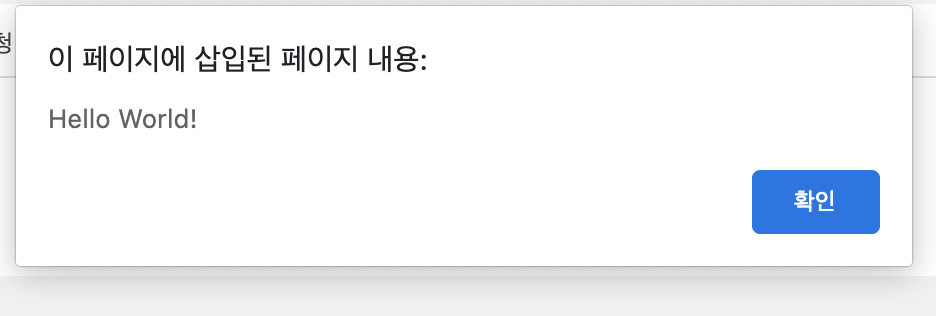
<h2>The button Element</h2>
<button type="button" onclick="alert('Hello World!')">Click Me!</button>
<!-- Button 요소는 클릭할 수 있는 버튼을 만들어준다 -->
<!-- onclick 속성은 클릭시 일어나는 결과를 정해준다 -->
</body>
</html>
결과
7. HTML Form의 요소들 - Fieldset
<!DOCTYPE html>
<html>
<body>
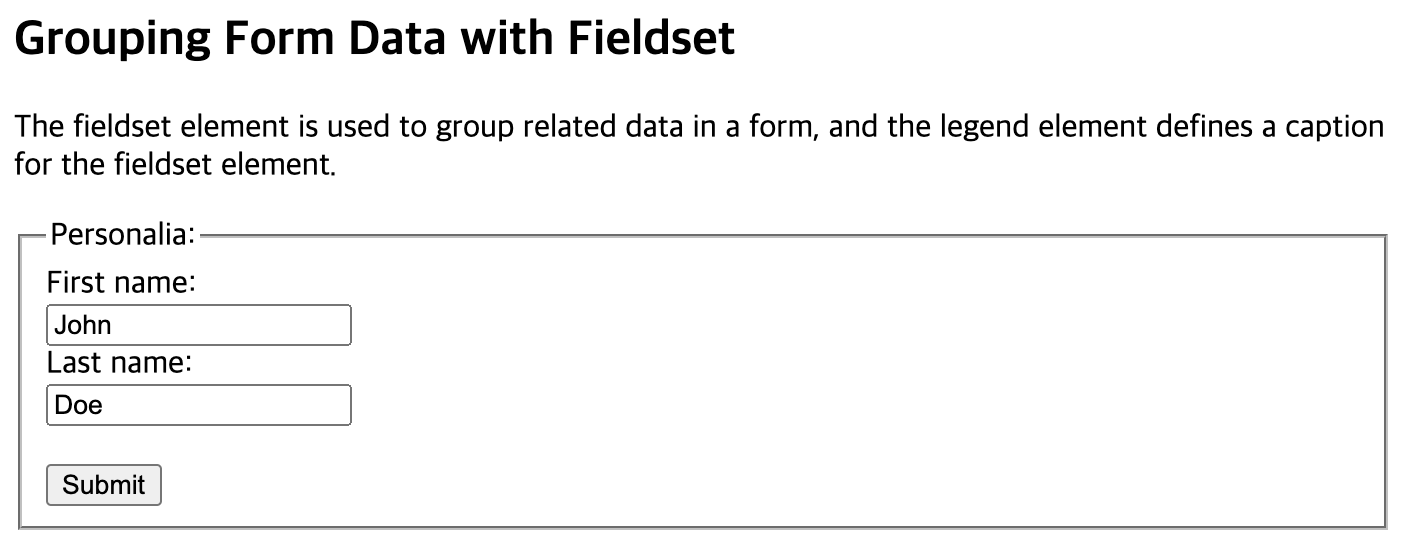
<h2>Grouping Form Data with Fieldset</h2>
<p>The fieldset element is used to group related data in a form, and the legend element defines a caption for the fieldset element.</p>
<form action="/action_page.php">
<fieldset>
<legend>Personalia:</legend>
<label for="fname">First name:</label><br>
<input type="text" id="fname" name="fname" value="Yohan"><br>
<label for="lname">Last name:</label><br>
<input type="text" id="lname" name="lname" value="Sun"><br><br>
<input type="submit" value="Submit">
</fieldset>
<!-- Fieldset 요소는 관련된 데이터를 하나의 form 영역으로 묶어준다 -->
<!-- Legend 요소는 해당 fieldset의 카테고리를 글자로 표시해준다 -->
</form>
</body>
</html>
결과
8. HTML Form의 요소들 - Datalist
<!DOCTYPE html>
<html>
<body>
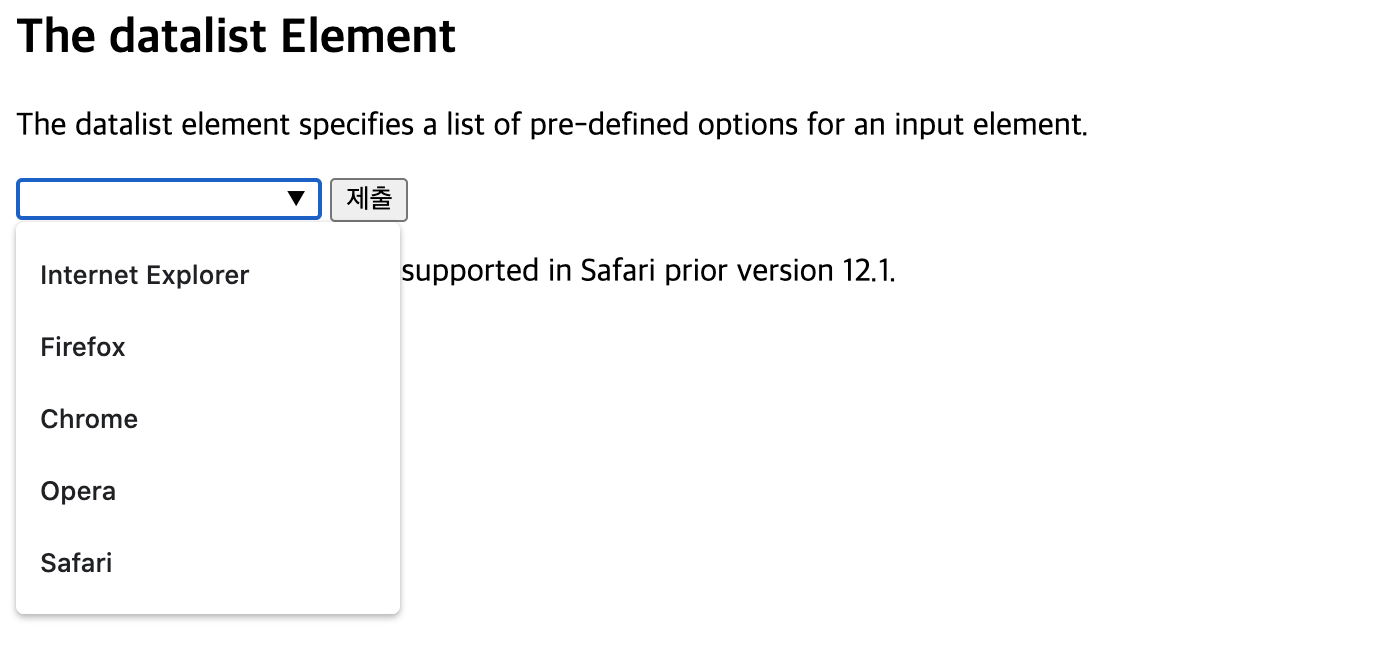
<h2>The datalist Element</h2>
<p>The datalist element specifies a list of pre-defined options for an input element.</p>
<form action="/action_page.php">
<input list="browsers" name="browser">
<datalist id="browsers">
<option value="Internet Explorer">
<option value="Firefox">
<option value="Chrome">
<option value="Opera">
<option value="Safari">
</datalist>
<!-- Datalist 요소는 input요소에 미리 정해진 옵션들을 제공해준다 -->
<!-- 사용자가 인풋을 하려고 할 때 목록으로 옵션들이 나오게 된다 -->
<!-- Input요소의 list속성의 값은 datalist요소의 id속성의 값을 참조해야한다 -->
<input type="submit">
</form>
<p><b>Note:</b> The datalist tag is not supported in Safari prior version 12.1.</p>
</body>
</html>
결과
CSS로 HTML Form 꾸미기
<!DOCTYPE html>
<html>
<style>
input[type=text], select {
width: 100%;
padding: 12px 20px;
margin: 8px 0;
display: inline-block;
border: 1px solid #ccc;
border-radius: 4px;
box-sizing: border-box;
}
input[type=submit] {
width: 100%;
background-color: #4CAF50;
color: white;
padding: 14px 20px;
margin: 8px 0;
border: none;
border-radius: 4px;
cursor: pointer;
}
input[type=submit]:hover {
background-color: #45a049;
}
div {
border-radius: 5px;
background-color: #f2f2f2;
padding: 20px;
}
</style>
/* 위와 같이 CSS로 HTML의 각 요소들을 선택해서 HTML 문서를 디자인할 수 있다 */
<body>
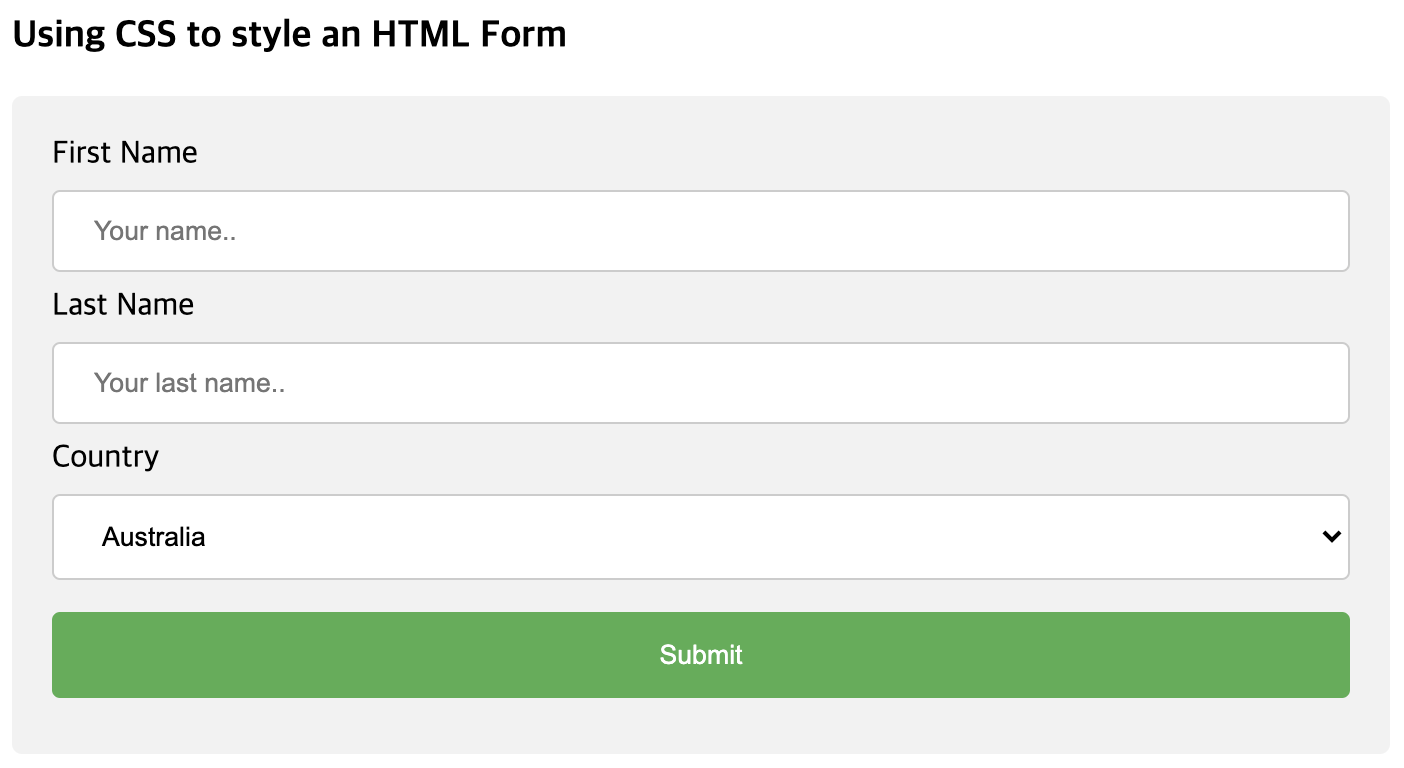
<h3>Using CSS to style an HTML Form</h3>
<div>
<form action="/action_page.php">
<label for="fname">First Name</label>
<input type="text" id="fname" name="firstname" placeholder="Your name..">
<label for="lname">Last Name</label>
<input type="text" id="lname" name="lastname" placeholder="Your last name..">
<label for="country">Country</label>
<select id="country" name="country">
<option value="australia">Australia</option>
<option value="canada">Canada</option>
<option value="usa">USA</option>
</select>
<input type="submit" value="Submit">
</form>
</div>
</body>
</html>
결과
Javascript로 웹페이지에 동적인 요소 만들기
1. Javascript란 무엇인가
자바스크립트 Interpreter 언어로 웹기반에서 사용되는 객체 기반의 스크립트 프로그래밍 언어이다. 자바스크립트의 특징으로는 타입이 없고 객체지향과 함수 사용이 가능하다. 주로 다른 페이지로 이동, HTML의 요소들을 동적으로 추가/제거/변경, 폼의 유효성 검증, 사용자와의 상호작용, 웹 브라우저 제어, 웹 서버와의 통신 등에 사용된다.
2. Javascript Event Handler
Event란 HTML의 한 요소에 어떤 일이 일어나는 일을 말한다. 이 때 만약에 자바스크립트가 HTML 페이지 내에 쓰이게 된다면 자바스크립트는 이 event에 반응(react)할 수 있다. 대표적으로 웹 페이지의 로딩이 완료 되었을 때, HTML의 버튼이 클릭 되었을 때, HTML을 통해 데이터가 입력되었을 때 등이 있다. 만약에 이러한 event가 발생하면 개발자는 이 event를 Javascript를 통해 감지하고 해당 event에 반응하는 코드를 만들 수 있다. 이러한 것을 ‘event handler’라고 하는데 대표적으로 <element event=‘JavaScript 코드’> 의 형식을 띈다.
<!DOCTYPE html>
<html>
<body>
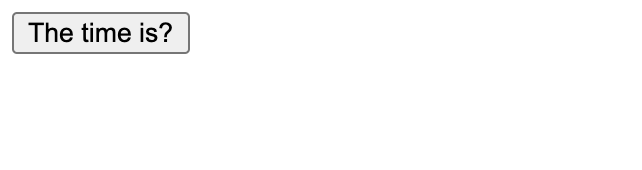
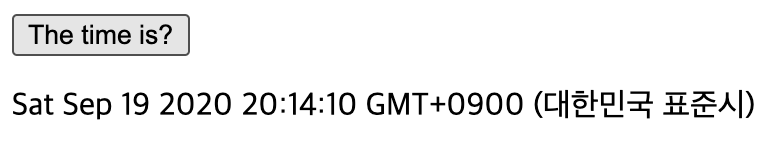
<button onclick="document.getElementById('demo').innerHTML=Date()">The time is?</button>
/* 위의 코드는 버튼 요소를 클릭했을 때 현재의 시간을 띄워주는 event handler이다 */
<p id="demo"></p>
</body>
</html>
결과
버튼 누르기 전
버튼 누른 후
위의 예시코드의 ‘onclick’ 외에도 여러 HTML event가 존재한다
| onchanged | HTML 요소가 바뀌었을 때 |
| onclick | 사용자가 HTML 요소를 클릭했을 때 |
| onmouseover | 사용자가 HTML 요소 위로 마우스를 움직였을 때 |
| onmouseout | 사용자가 HTML 요소 밖으로 마우스를 움직였을 때 |
| onkeydown | 사용자가 키보드를 눌렀을 때 |
| onload | 웹 브라우저가 로딩을 완료했을 때 |
Leave a comment